![]()
Brioche
Brioche
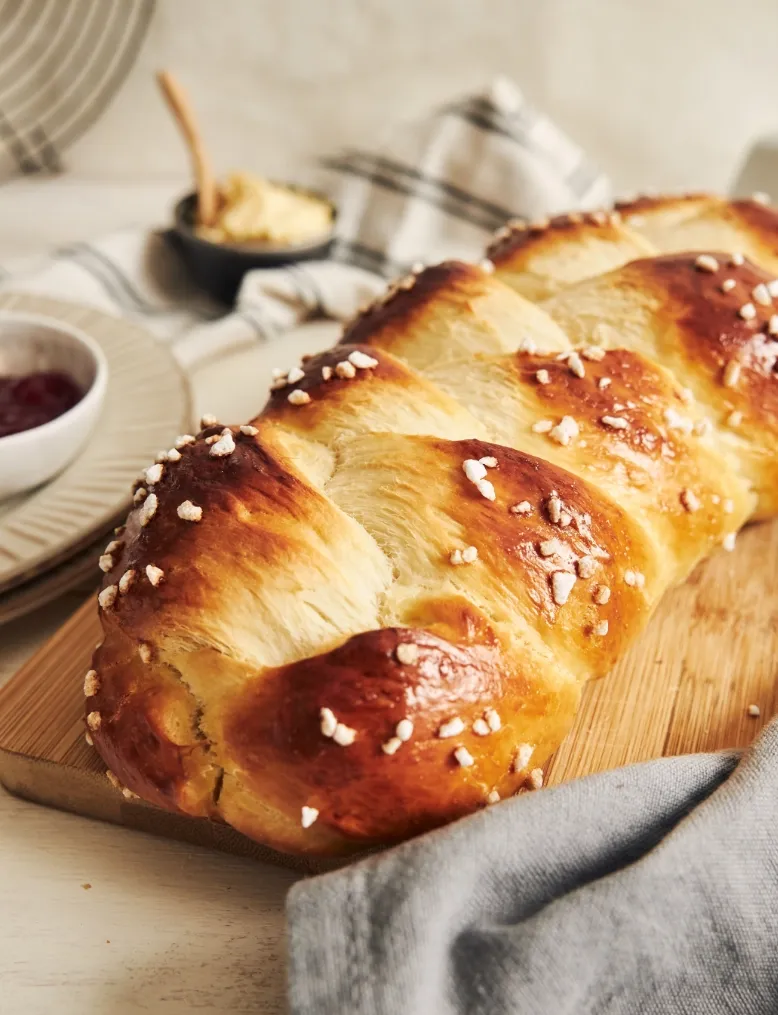
This classic French bread sits somewhere between a bread and a pastry, with an airy crumb that melts in your mouth and a slight crispness on the crust that’s pure comfort. Whether you’re spreading it with jam, dunking it in coffee, or using it to make the dreamiest French toast, homemade brioche is about taking a moment to indulge in simple, beautiful baking.
Ingredients
- 500 gr plain flour
- 3 gr instant yeast
- 100 ml whole milk lukewarm
- 50 gr caster sugar
- 1 tsp salt
- 4 egg room temperature
- 150 gr unsalted butter softened, cut into small cubes
- 1 egg yolk, for glazing
Equipment
- 1 stand mixer with dough hook attachment
- 1 Loaf pan 23cm
Instructions
- 1. Activate the yeastWarm the milk until just lukewarm (around 37°C). Stir the yeast into the milk until dissolved. Let it sit for 5-10 minutes until foamy.
- 2. Mix the doughIn the stand mixer bowl, combine the flour, sugar, and salt. Attach the dough hook. Add the foamy yeast-milk mixture along with the eggs. Mix on low speed to bring the dough together.
- 3. Incorporate the butterGradually add the softened butter cubes into the dough while mixing. Continue mixing for at least 15 minutes on medium speed. The dough should be smooth, elastic, and slightly sticky but should come away from the bowl.
- 4. First riseCover the bowl with a clean towel or plastic wrap. Leave the dough to rise in a warm place (24-28°C) for about 1-2 hours until doubled in size.
- 5. Chill and shapeGently punch down the dough to release gases. Refrigerate for 1 hour to firm up the butter and make shaping easier. After chilling, divide the dough into equal portions (typically 8-10). Shape each portion into a smooth ball.
- 6. Second rise in tinPlace the dough balls into a greased loaf pan. Cover and let rise again for 1-1.5 hours until doubled.
- 7. Prepare for bakingPreheat the oven to 180°C (160°C fan). Brush the risen brioche gently with the beaten egg yolk for a shiny, golden crust.
- 8. BakeBake in the centre of the oven for 25-30 minutes or until the brioche is golden brown on top and sounds hollow when tapped underneath.
- 9. CoolRemove from the oven and let cool completely on a wire rack before slicing.
Notes
- For best results, ensure all ingredients are at room temperature to help the yeast activate smoothly.
- The chilling step after the first rise is key to achieving the brioche’s delicate, buttery flakiness and ease of handling.
- Brioche dough is sticky but resist adding too much flour!
- Patience during rising is essential for light texture.
About this recipe
Brioche is one of those special recipes that really holds a place in the heart of French baking, deeply rooted in Normandy’s rich dairy traditions. Dating back to the Middle Ages, bakers in that region whipped up this glorious bread with plenty of butter, eggs, and just a touch of sugar, usually for festive celebrations. Over time, brioche has grown from a simple bread to a symbol of indulgence and celebration, often shaped beautifully with delicate twists or topped with a little “head,” known as brioche à tête.
What really makes brioche stand out is its light, airy texture paired with a buttery richness that just melts in your mouth. It’s a bit of a challenge, honestly, because the dough needs careful kneading to get that just-right elasticity. And when you’re aiming for true French authenticity, nothing beats using the best quality butter (preferably from the Normandy pastures ) which gives the brioche its unique flavour and aroma.
Historically, brioche was seen as a bread for the royals and aristocrats, reserved for grand occasions and lavish breakfast tables. But it’s incredibly versatile and today it’s often dipped in coffee at French breakfast tables. But you can also turn it into the most decadent French toast, or even make savoury buns (for your hamburger for example) and desserts. It’s woven into everyday French life, especially around lazy Sunday brunches or any time a little celebration’s needed.
These days, chefs all over the world love to play with brioche, adding different flavours and fillings, but the classic French version remains timeless. Baking your own brioche at home gives you that warm, buttery smell that fills the kitchen, a smell that’s impossible not to smile at! It’s a slice of pure pleasure all baked into one beautiful, golden loaf.
Share your feedback and spread the love!
If you try this Brioche recipe, I’d love to hear how it turns out! Leave a ★★★★★ rating and your thoughts in the comments, it helps fellow food lovers discover this recipe too. Snap a photo and tag @frogsinbritain on Instagram if you’re sharing your bake online. Don’t forget to save this recipe to Pinterest so you’ll always have it handy for your next French-inspired meal!
Disclosure: This post contains sponsored content and/or affiliate links. If you make a purchase through these links, I may receive a small commission at no extra cost to you. All opinions are my own!